INTRODUCTION
Hey there, students! Are you ready to dive into the exciting world of WordPress development? Before you unleash your creativity on a live website, it’s crucial to have a safe testing ground. That’s where local WordPress development comes in, allowing you to experiment, learn, and build amazing websites without affecting a live domain.pen_spark
This guide will equip you with the knowledge to install and configure WordPress on your local machine using XAMPP, a free and user-friendly software suite. By the end, you’ll have your own personal WordPress playground ready for exploration!pen_spark
Why Go Local? The Benefits for Students:
Experimentation Freedom: Test plugins, themes, and code modifications without affecting a live website.
Safe Learning Environment: Learn from mistakes without any real-world consequences.
Offline Development: Work on your projects even without an internet connection.
Free Development Environment: No need to invest in web hosting while you’re learning.
Why Create a Local WordPress Site: A Playground for Students and Developers
Have you ever dreamt of building stunning websites but worried about messing things up on a live domain? Look no further than local WordPress development! It offers a safe and controlled environment for students and developers alike to experiment, learn, and build amazing websites without any risks. But why exactly would you choose to go local when building with WordPress?
Important: A local website will only be visible to you on your computer. If you want to make a live website, then you’ll need a domain name and WordPress hosting.
Follow the step-by-step instructions in our guide on how to start a WordPress blog when you are ready to create a live website.
Having said that, let’s check out how to install WordPress locally on Windows, Mac, or Linux using XAMPP.
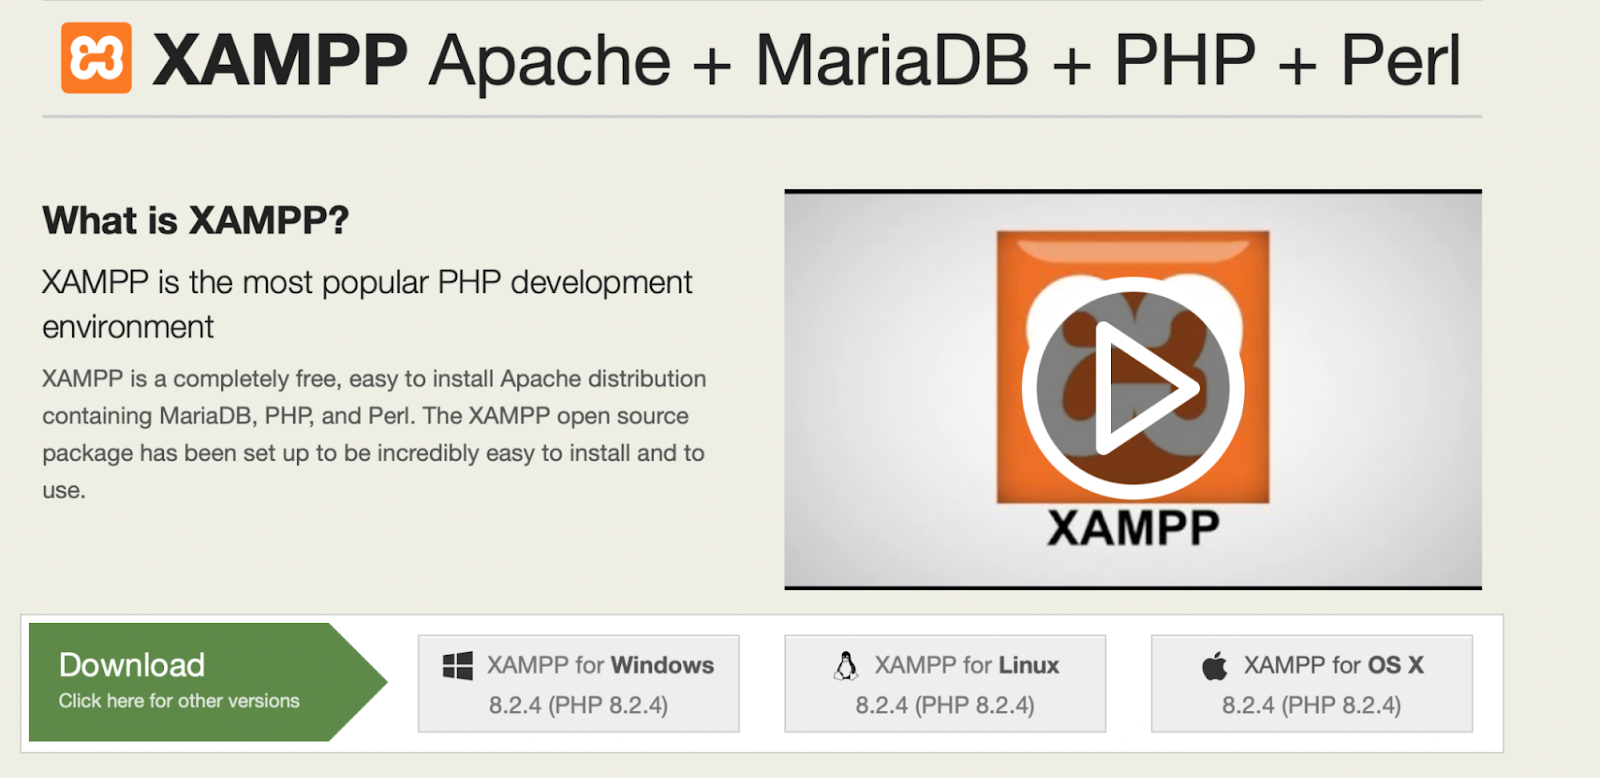
What Is XAMPP?
XAMPP is a software package that includes all the things you need to set up a local server environment on your computer.
In order to create a local WordPress site, you need to set up a web server software (Apache), PHP, and MySQL on your computer.
PHP is a programming language, and MySQL is a database management software. Both of them are required to run WordPress.
Installing them separately is quite difficult for beginners. This is where XAMPP comes in.
XAMPP makes it easy for you to build WordPress websites locally. It is available for Windows, Mac, and Linux-based computers.
Let’s get started by installing XAMPP and setting it up to run your local WordPress site.
How to install WordPress on localhost
Now that you know a bit more about localhost, let’s take a look at how to install WordPress on Localhost using XAMPP.
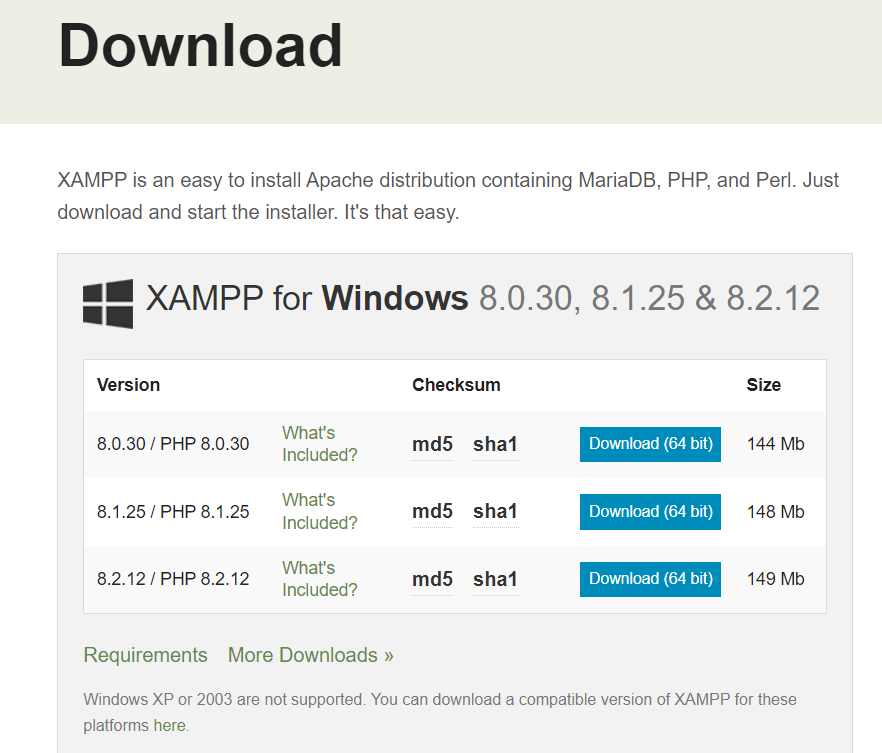
Step 1: Download XAMPP
First, you need to visit the XAMPP website and click on the ‘Download’ button for your operating system.
Depending on your operating system, your installation wizard and the application interface may differ from the screenshots here. For the sake of this article, we will show you the Windows version of the software.
After downloading XAMPP, you will need to click and run the installer.
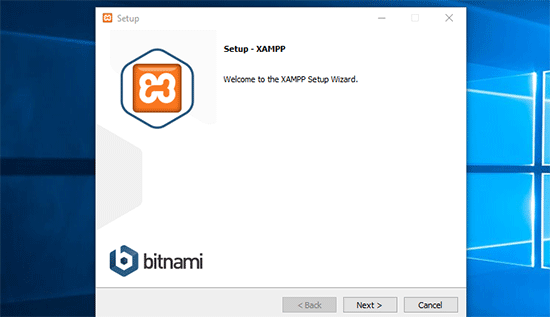
XAMPP will ask where to install the software and which packages you’d like to install. The default settings will work for most users. Keep clicking on the ‘Next’ button to finish the setup wizard.
After finishing the wizard, check the ‘start the control panel now’ option and then click on the ‘Finish’ button.
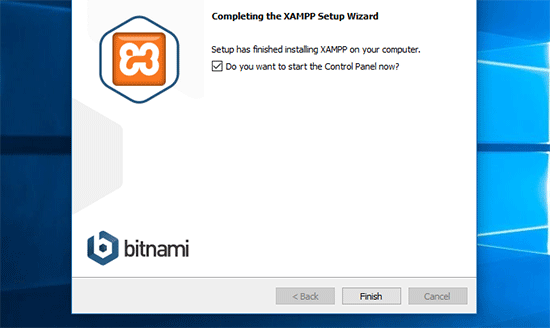
This will launch the XAMPP Control Panel app.
Using the XAMPP app, you can run Apache web server as your local server and MySQL as your database server. Go ahead and click on the ‘Start’ button next to both Apache and MySQL.
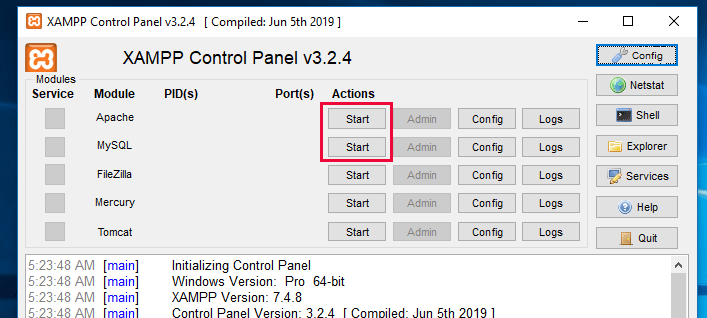
XAMPP will now start Apache and MySQL.
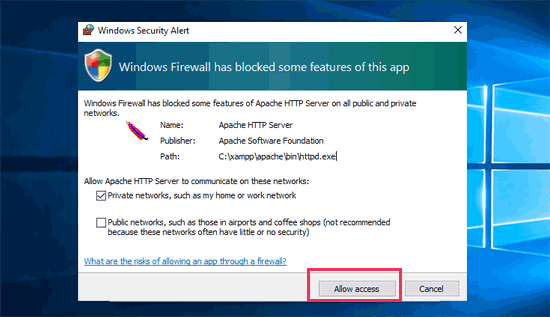
You may see a Windows firewall notification. It is important that you click on the ‘Allow Access’ button for both applications to run on your computer.
Once both applications are started, their names will be highlighted in green.
Now, you are ready to create a local website and install WordPress using XAMPP.
Creating a Local WordPress Site With XAMPP
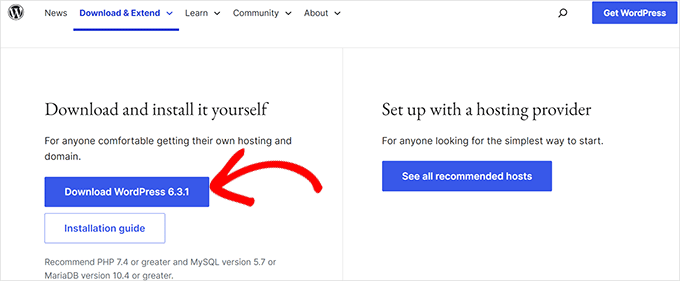
First, you will need to download WordPress. Visit the WordPress.org website and click on the ‘Download WordPress’ button.
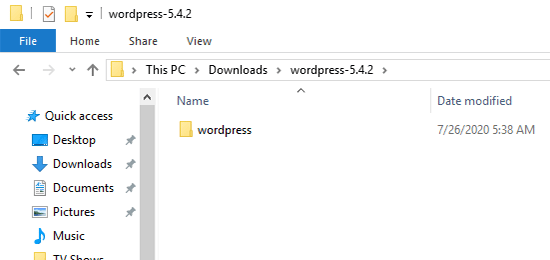
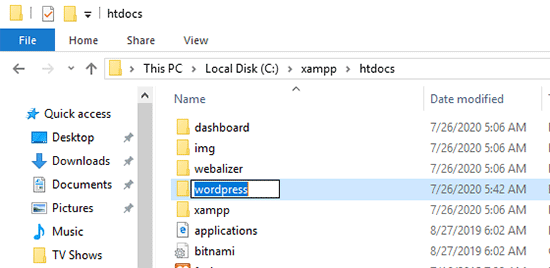
After downloading WordPress, you need to extract the zip file, and you will see a wordpress folder.
You need to copy this folder.
Next, head over to your XAMPP installation folder.
On Windows, it will be C:/Program Files/XAMPP/htdocs or C:/Xampp/htdocs.
On Mac, it will be /Applications/XAMPP/htdocs.
Paste the wordpress folder you copied earlier inside the ‘htdocs’ folder.
We recommend renaming the ‘wordpress’ folder to ‘website’ or anything else. This will help you easily identify your local site.
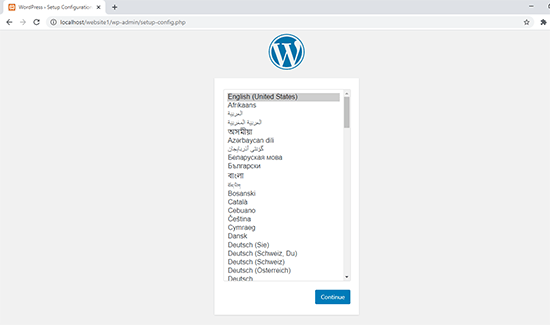
Next, you need to open your favorite web browser.
You can enter the following URL into your browser’s address bar:
If you renamed the WordPress folder something else, then make sure you replace ‘website1’ with your own folder name.
This will load the WordPress installation wizard, and you’ll be asked to select a language. After selecting a language, click on the ‘Continue’ button.
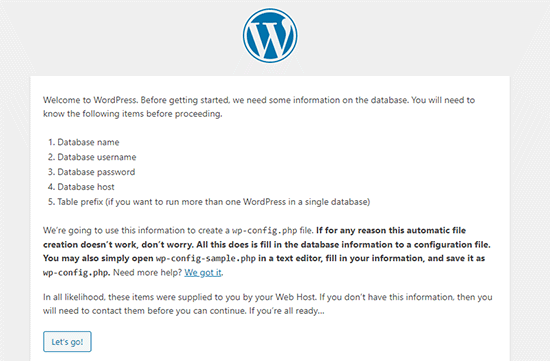
On the next screen, you will see the WordPress welcome screen.
It includes a notice that WordPress needs a database name, database username, password, and host information.
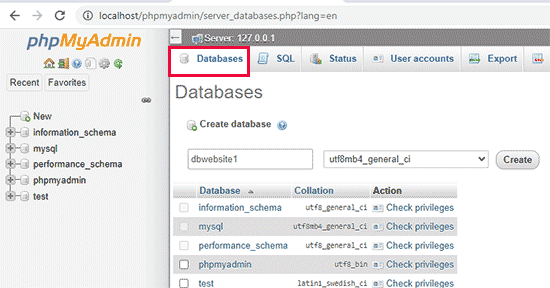
Let’s create a database for your WordPress site.
You’ll need to open a new browser tab and visit https://localhost/phpmyadmin/.
This will launch the phpMyAdmin app that comes pre-installed with XAMPP. It allows you to easily manage your databases using a simpler interface.
You need to click on ‘Databases’ and provide a name for your new database. After that, click on the ‘Create’ button to continue.
Now that you have created a database, you can use it for your WordPress site.
Switch back to the /localhost/website1/ browser tab and click on the ‘Let’s Go’ button.
On the next screen, you will be asked to provide your WordPress database information.
Enter the database name you created earlier. Your username is ‘root’, and you should leave the password field blank. For the database host field, you need to use localhost.
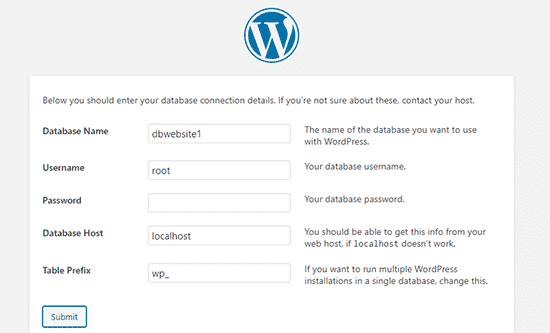
Once you are done, click on the ‘Submit’ button to continue.
If you are on Windows or Linux, WordPress will now store these settings in your WordPress configuration file called wp-config.php.
However, if you are on a Mac, then it will show you the contents of the file and will ask you to create it.
You will need to create this file in your website’s root folder.
After creating the file, paste the text you copied earlier inside it. Next, you need to save the file and return back to the WordPress installer to continue.
In the next step, WordPress will ask you to provide information about your website. First, enter the title you want to use for this site.
After that, you need to enter a username, password, and email address for your admin account.
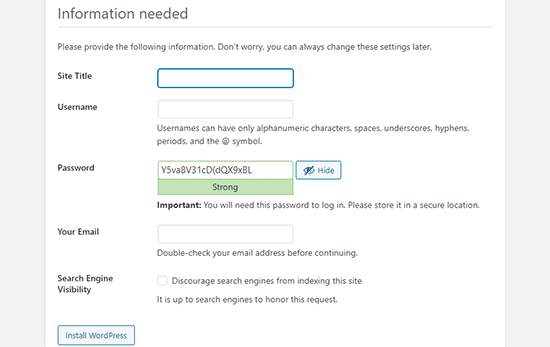
Once you have filled in all the information, click on the ‘Install WordPress’ button to continue.
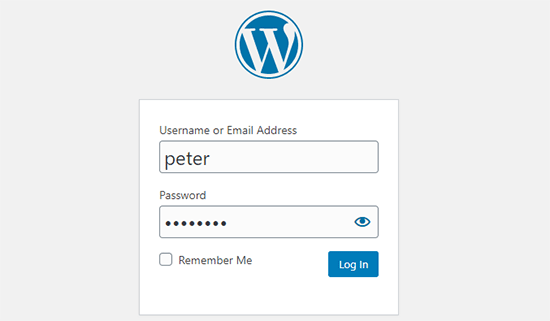
WordPress will now run the installation and prompt you to log in once it’s done.
You can log in to your website by going to the /localhost/website1/wp-admin page and using the username and password that you entered during installation.
Things to Try After Creating a Local WordPress Site
Now that you have created your local WordPress site using XAMPP, you can work on it like you would on a live WordPress site.
Head over to the Appearance menu in the WordPress admin sidebar to customize your site’s appearance or install a new theme.
Here are some great free themes that you can try.
The next thing you would want to try is installing some WordPress plugins.
Plugins are like apps for your WordPress site and allow you to add cool features like a contact form, social media buttons, an eCommerce store, and much more.
Need help installing plugins? See our step-by-step guide on how to install a WordPress plugin.